

I’m so pumped about this series, I wrote you a poem!
Oh, friends, today is gonna be fun!
Welcome to part 2 of Gardening 101.
Here’s part 1 if you’re just digging in.
Today we’re gonna talk seeds, supplies, and sources for your garden.
Well, I may not be the greatest poet, but I sure do love this gardening thing! Today we’re going to tackle how to choose what to grow, some thoughts on basic garden supplies, fun with seed starting, and how to make your own raised beds if you’re interested. I have some great–and simple–info for you!
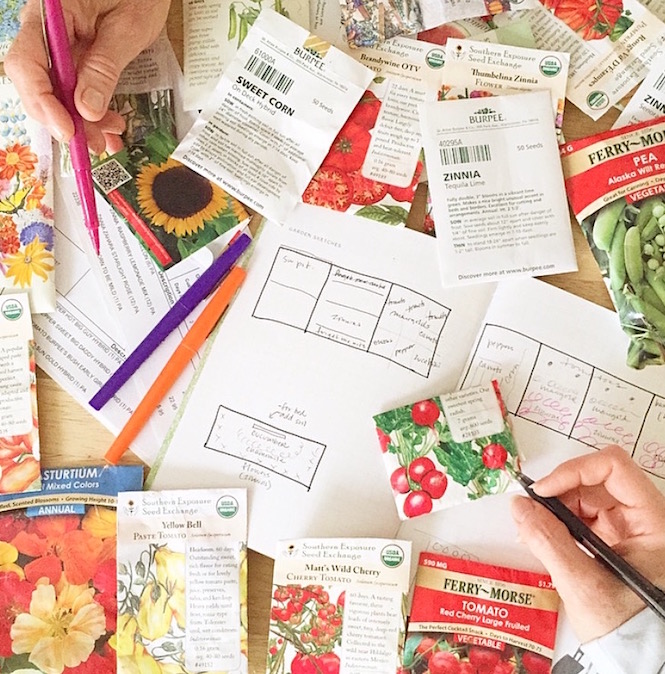 Garden planning with my mom and Grace.
In part 1, you made your Garden dreaming list of all the things you want to grow. Grab that list, and let’s work through it to decide what to plant this season.
We’re going to consider these five key things: money, time, space, sun, and soil.
1. Money. You could buy a seed packet for less than a dollar and plant in the soil you’ve got if it’s good soil. Or you could go with a few small containers to start. Or you could try your hand at a raised bed or two, which requires a bit more resources. Decide on a gardening budget that’s comfortable for you. If you need to start small, that’s okay! A little goes a long way, and you can always do more later! Gracie’s Garden started with a few containers and grew over the course of five years. We now have over 40 feet of raised veggie bed space and lots of flower beds. Our garden space and plantings expanded over time, and over that time we learned to care for it all. Choose what works for you in this season of your life.
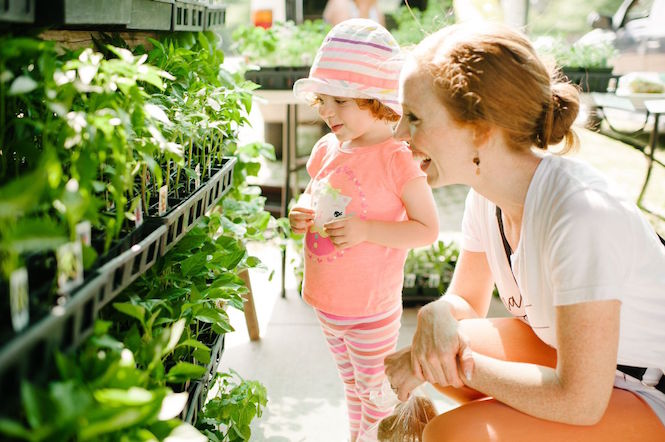 A great place to find plants is at the local farmer’s market if you have one!
2. Time. Growing a garden isn’t just about planting things once and never having to touch them again. Depending on what you grow, there’s a lot of ongoing tending that happens–which to me is the fun part! Planting our garden takes a few days, and tending and watering takes me about 15-30 minutes a day. Sometimes it takes much less time during a week when it rains, but there are also times it takes a lot longer, like when I need to prune. Consider the maintenance needed for certain plants. Tomatoes generally require staking and pruning, but they give you fruit over time. Carrots, however, grow, get pulled out of the ground once, and that’s it!
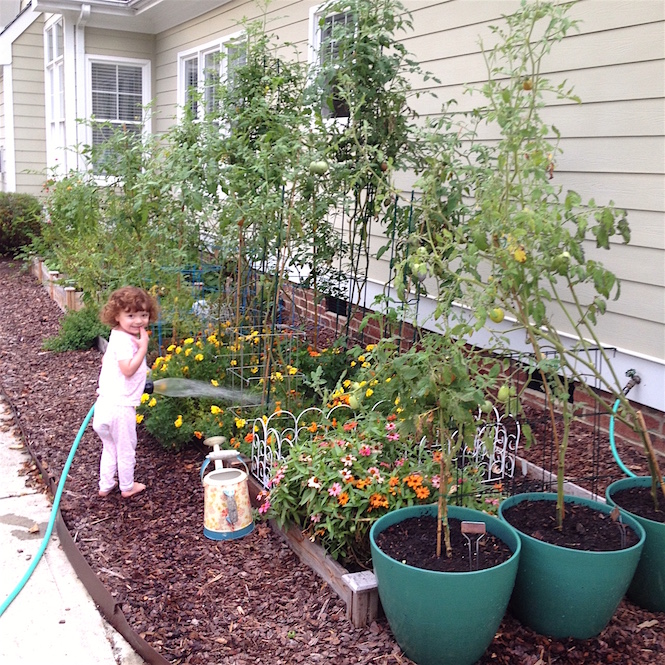 My little gardener giving the plants a drink.
3. Soil. The soil is what sustains the life of the plant, providing nutrients, and allowing deep roots to grow. Good soil is a gardener’s gold. But, let me tell you right now, that “perfect” soil is not required. Here’s a shortcut: call your local garden shop or garden extension service. First, ask them about the general soil in your area. Here in North Carolina, we have clay soil, which means that it doesn’t drain or allow plants to root well. So, raised beds are a must for us. In areas of our yard where I’ve done in-ground planting, I’ve had to dig out mass amounts of clay first to replace it with looser “loamy” soil.
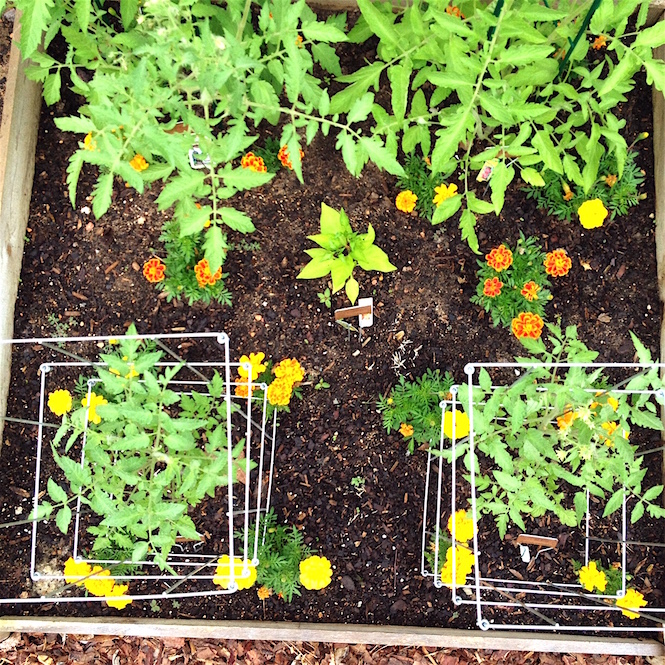 Tomatoes love marigolds and I love them both.
Whether you are planting in pots, or raised beds, or in-ground, you’re likely wondering what kind of soil to use. A reminder: I’m no expert here, and that’s why this series is titled Gardening 101!
Here are some soil basics. Plants need nutrients in the soil to grow, and when you grow lots of veggies and flowers, they suck the nutrients out of your soil. So, each growing season, you’ll need to add nutrients back to the soil to keep everything happy. This is called “amending the soil.” But, how do you know what nutrients to add? Testing your soil is the only way to know what your soil needs. You can usually get a free test through your local extension office (this is what I do now!). I also found this test kit that I have used in previous years. Once you know what your soil is lacking, take a look at what you’re growing and see what nutrients each plant needs. Do a quick internet search to find that info. For instance, here’s a simple article on soil needs for tomatoes!
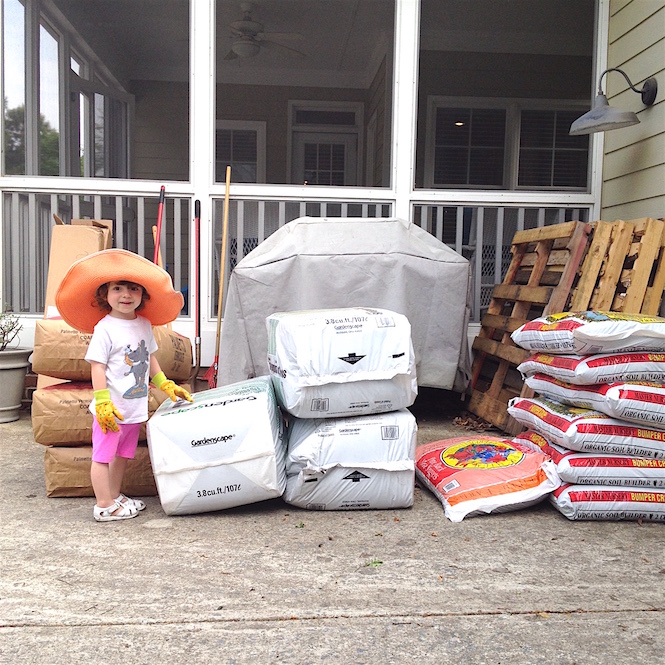 Dirt, beautiful dirt! Actually, that’s bags of vermiculite, peat moss, and mushroom compost.
Okay, let’s talk dirt. If you are starting from scratch, what kind of soil should you use? A couple years ago, we tried making Mel’s mix (read about it here) which was super labor-intensive and did not work well in the end for us. We had one raised bed with Mel’s Mix and one right next to it with another combination. Mel’s mix didn’t seem to make our plants as happy. We’ve also used bagged MiracleGrow vegetable bed soil and lots of other bagged soils.
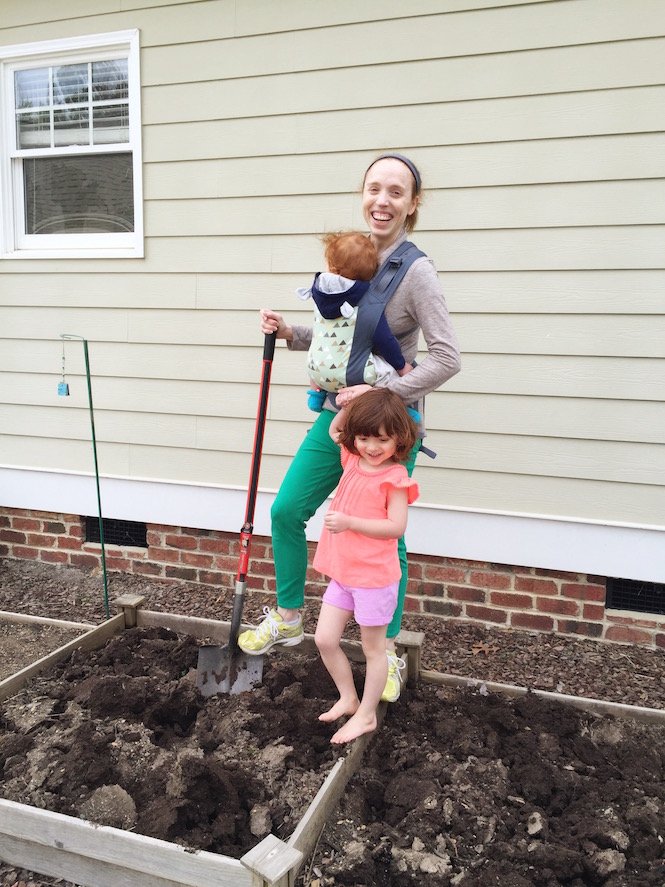 Tilling up the garden beds last year with a baby on my chest. : )
But here are our two favorites:
1. A local grower’s mix of organic mushroom compost, crushed shells and vermiculite (helps our soil to drain well), and organic topsoil. Lots of local nurseries and landscape supply places mix their own soil, so do a little research and ask around to find the best! This is the soil mix we started with in most of our raised beds.
2. Black Kow mixed with organic mushroom compost. Grace lovingly calls the Black Kow, “poopy cow,” because…. well, that’s what it is. And it just plain works. Every year, we (meaning me with Grace playing in the dirt while I do this) till up our existing soil with a big shovel and mix a few bags of poopy cow and mushroom compost into our raised beds for added nutrients. So far so good!
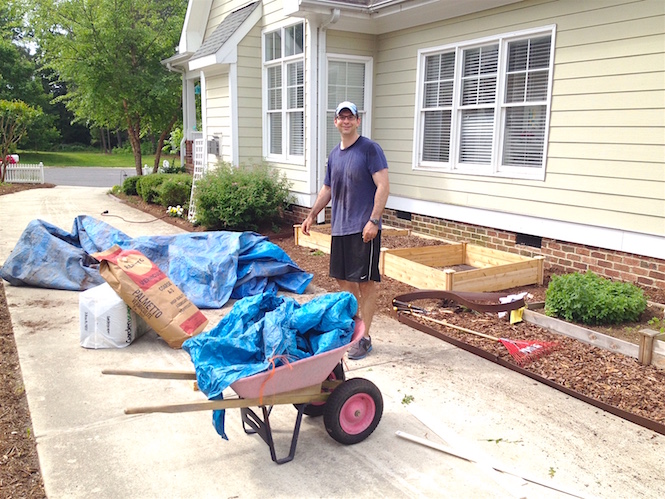 Husband of the year here, mixing soil for me and helping construct new garden beds.
What about fertilizer? I haven’t gotten into composting yet, so for now, I’m using traditional fertilizers. I sprinkle some ‘MaterMagic in with my veggie plantings once they have had some time to root. I use Dr. Earth’s fruit tree fertilizer for all the trees a few times a year, too, but the Black Kow mixed into the pots works just as well. For our bulbs, I use Jobe’s Organics bone meal. If we plant beans, I use a nitrogen booster. This all sounds very complex, but so much of what you need to know is easy to Google and, many times, written on the seed packets! : )
 The year we tried Square Foot Gardening.
4. Sun. Most vegetables need 6-8 hours of direct sun. My vegetable garden actually only gets about 5 hours of full sun, but somehow it still does well. One end of the raised bed area gets a bit more sun than the other, though, so I purposely plant the more sun-loving veggies there like tomatoes and peppers. On the shadier end, I have some part-sun flowers and creeping vines that like a little respite from the heat every now and then. If your garden spot doesn’t get much light, you can still grow many leafy vegetables such as lettuce and spinach, but in general, the sunnier the better.
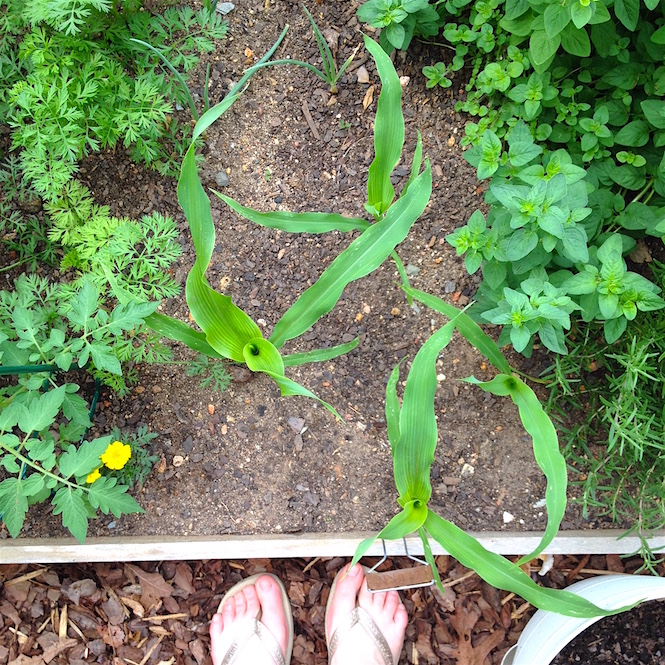 Carrots, corn, oregano, rosemary, tomatoes and a marigold living together. There might be a couple onions in there too.
5. Space. You don’t need a ton of space to grow a garden. If you follow the Square Foot Gardening method, you’ll be able to pack a lot in a tiny space. But, plants do need room to root and spread out. I made the mistake of planting too much in a small space my first year of gardening, and most of my tomatoes ended up pretty tasteless. Just like our lives, if you grow too much in one space, you won’t have enough nutrients to go around. So, consider your space. Like I mentioned in Part 1, gardens come in all shapes, types, and sizes!
 I love Gracie’s sweet handwriting. : )
So, what are you going to grow? Let’s look at that garden dreaming list you made from part 1. Considering the five keys we just discussed (money, time, soil, sun, and space), what on your garden dreaming list is a must-keep, and what needs to get crossed off for now? Another way to pair down your list is to do a little research to find out what will grow well in your zone and season, like we talked about in Part 1. This is very helpful info to have! I am purposely holding off on planting a few things till later in the season because they need more heat to grow (watermelons for instance). So, till then, I’ve got an open space in my garden that I can fill for a few months with carrots!
Widdle that list down to what works best for your particular garden, your season of life, and what you will enjoy most. Don’t have enough sunny space for all those veggies on your list? Grow what you have space for. Don’t have time to deadhead cosmos all summer (I learned this the hard way last year)? Don’t plant many–or consider cutting them off your list altogether. Don’t have the budget for raised beds this season? Start with a few pots! Or get creative and try these unusual garden planter ideas. My best advice is to start small. You can always add more later in the season–or in future years!
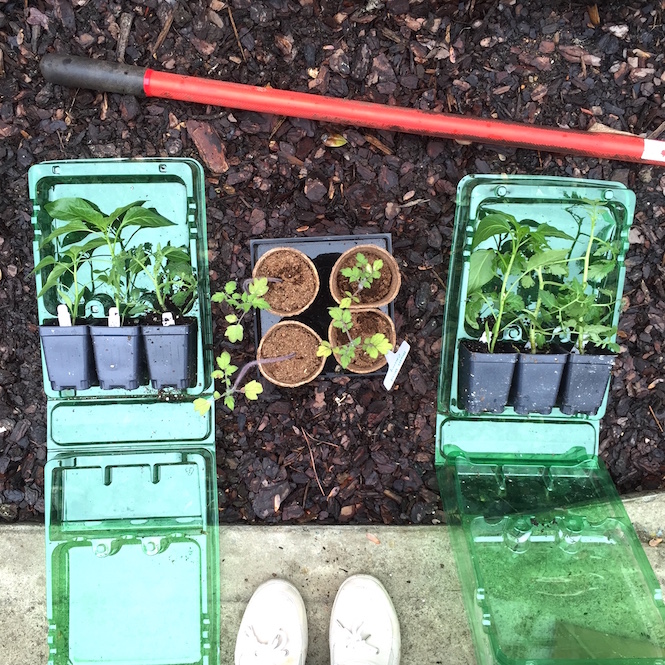
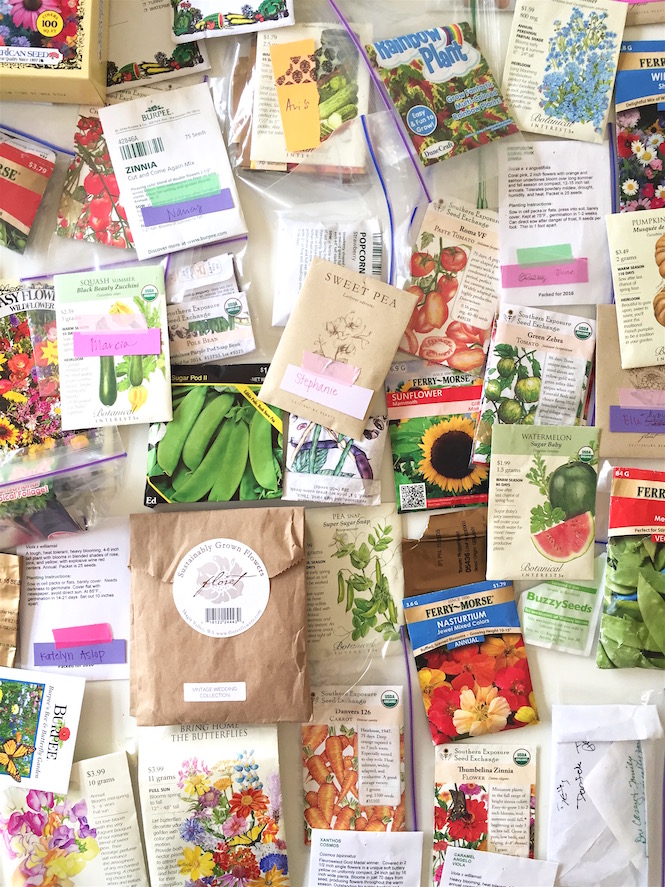 All of our seeds spread across the dining room table!
Now, let’s dig into some seed and supply sources. This is not an exhaustive list, and you may have great sources I haven’t discovered yet. I’d love to hear your thoughts too! : )
Some of my favorite garden supplies and sources:
Numero uno on my list are the magical garden beings called Master Gardeners! Have you heard of Master Gardener’s before? I did not know this service existed until just a few years ago when I was trying to figure out how to deal with the hornworms on my tomato plants, and I met one at a garden shop. Master Gardener programs (also known as Extension Master Gardener Programs) are volunteer programs that train individuals in the science and art of gardening. These individuals pass on the information they learned during their training, as volunteers who advise and educate the public on gardening and horticulture. Do a quick Google search to see if your area has this program–they likely do! I’ve met several Master Gardeners at garden fairs and local events, and they are a wealth of knowledge.
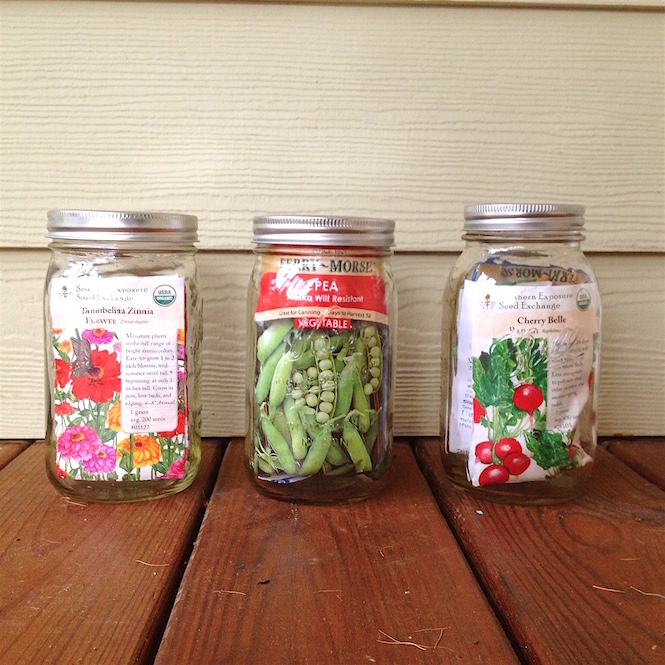 I store my seeds in the bottom of our refrigerator in Mason jars to help them last a little longer.
Seeds:
Burpee (I have often ordered a few weird wildcard veggies from them like On-Deck Corn and Strawberry popcorn!)
Floret Flower Seeds (my favorite flower seeds and bulbs)
Park Seed (another favorite for flower seeds, specifically zinnias)
David’s Garden
Renee’s Garden
Botanical Interests (lots of heirloom seeds)
Southern Seed Exchange Catalog (You must get a printed version of this catalog. It’s so beautiful and informative!)
 Mail-order veggies from Burpee above. They always arrive in great shape.
Supply sources:
First, I love local garden stores! I do shop at some of the big box stores that carry locally grown plants (Lowes often has lots of local growers highlighted!), but there’s something magical about going to the smaller garden shops. One of our favorites here, For Garden’s Sake, even has goats, chickens, and alpacas that you can visit. Local garden shops are often run by passionate gardeners who get excited when someone asks a question or needs advice. Use the resources in your area–you might even make a new friend or two!
A few supplies we use and love:
Greenes raised bed kits — We have several of these and they come in all different sizes. SO fast and easy to assemble!
Tomato ladders – These things are the best!
Tomato cages
Nitrile-coated garden gloves – Great if you have roses or pokey veggies like cucumbers.
My Joyful Garden planner
And here’s a great post about trellis ideas!
I do have a few trowels and clippers, but I often end up using soup spoons, Grace’s craft scissors, and my bare hands! You don’t need fancy tools to grow a garden. And larger sticks from your yard make great tomato supports too!
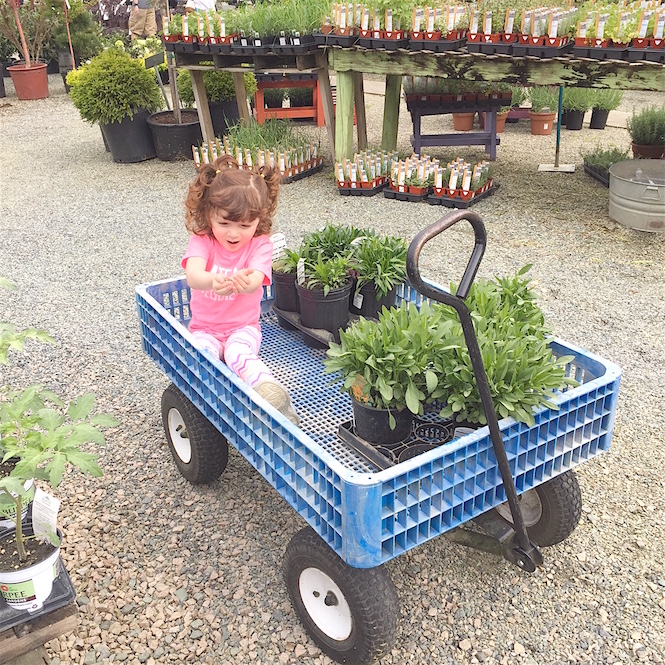 At our local garden shop getting some perennials for the front yard. Grace is more excited about the rocks!
Gardening books I own and love:
Cut Flower Garden
Square Foot Gardening
Carrots Love Tomatoes, an excellent resource for companion planting
The Vegetable Gardener’s Bible
A favorite children’s book I read when I was a child, and now read to Grace, The Reason for a Flower.
Do you have a favorite gardening book or resource? I’d love to hear!
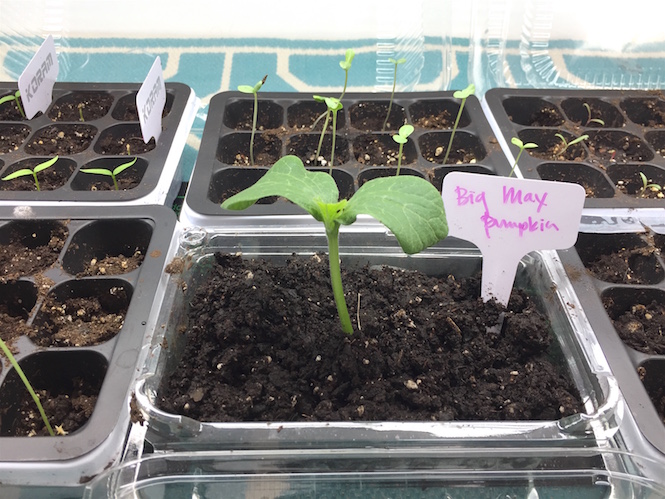 A peek at our seeds today! Big Max is getting BIG!
Seed starting. Depending on where you live, starting seeds indoors can help extend the length of the growing season for many plants. If you have hot summers like we do, it can give you a headstart on growing things that don’t love the heat. And, it’s just fun! We didn’t start any seeds indoors two seasons ago because we were a little busy caring for two little new babies. But, last year, we jumped back in! We started tomatoes, peppers, some zinnias, sweet peas, and pumpkins. After trying unsuccessfully year after year, we are determined to grow a pumpkin in 2018!
To start seeds indoors, you mimic the conditions needed for a seed to germinate and sprout outdoors: warmth, water, darkness, and once the seed sprouts, light!
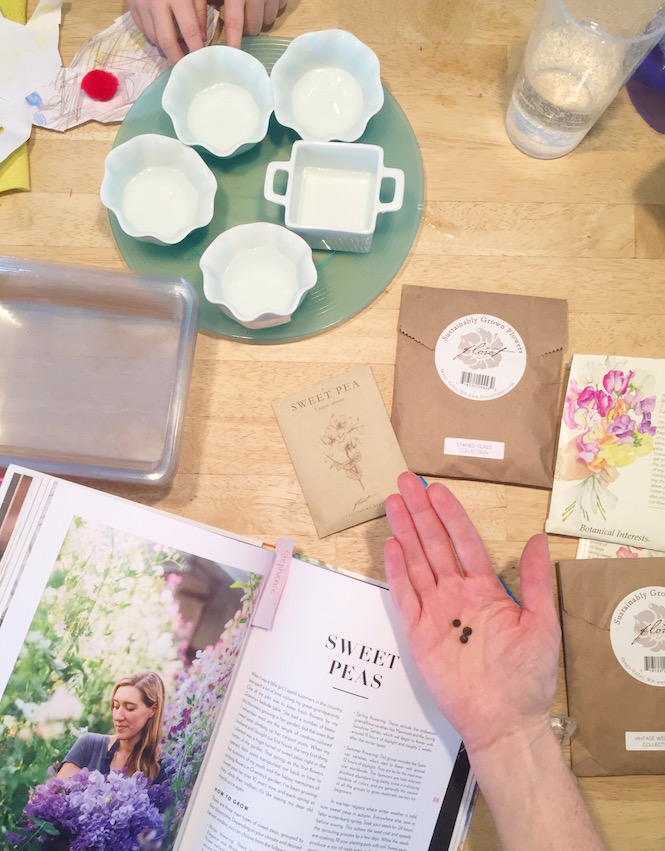 Following Erin’s instructions for starting sweet pea seeds!
You don’t need a grow light like we have (we purchased this one several years ago and it easily stores away in our front hall closet when we’re not using it) to start seeds indoors. You can simply use empty egg cartons, some plastic wrap, and a bright window. See this tutorial for more. And be sure to read this awesome post for more seed starting basics.
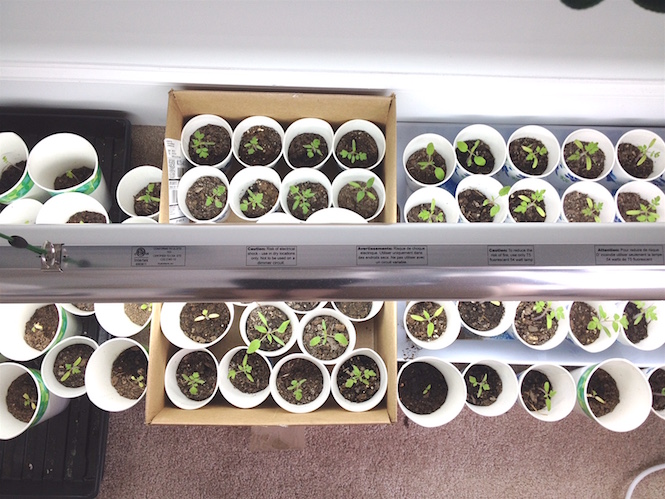 Tomato seedlings in paper cups.
How to make your own raised garden beds. I built two new garden beds last year that still look great—and all for about $40 each. I went to Lowes and picked out a couple untreated cedar planks (do not use treated wood as it has harmful chemicals in it), had the nice gentleman there cut them for me into eight sections – four 2′ sections and four 4′ sections. I got a small roll of landscape fabric, a box of 2″ long nails, and I already had a 1″ x 2″ board at home that I sawed into eight sections to bolster the inside corners of my garden beds. I built the boxes in a similar way to this tutorial, then used a staple gun and attached the landscape fabric (helps keep weeds and critters out) to the bottom of each bed before placing them where I wanted them. I filled them all with soil, and that was that! These two beds took about an hour to construct.
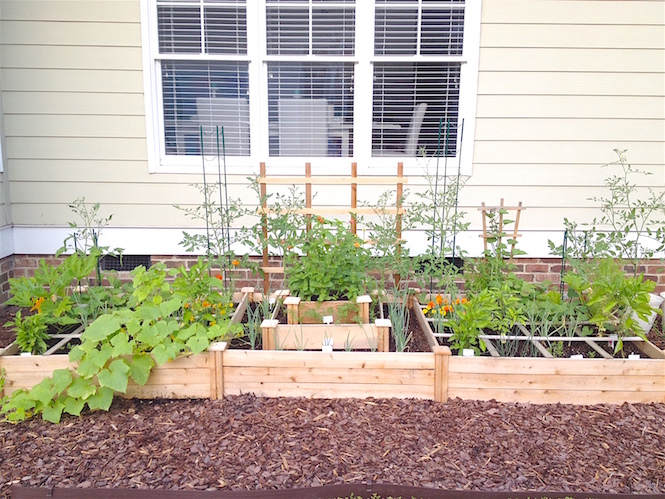
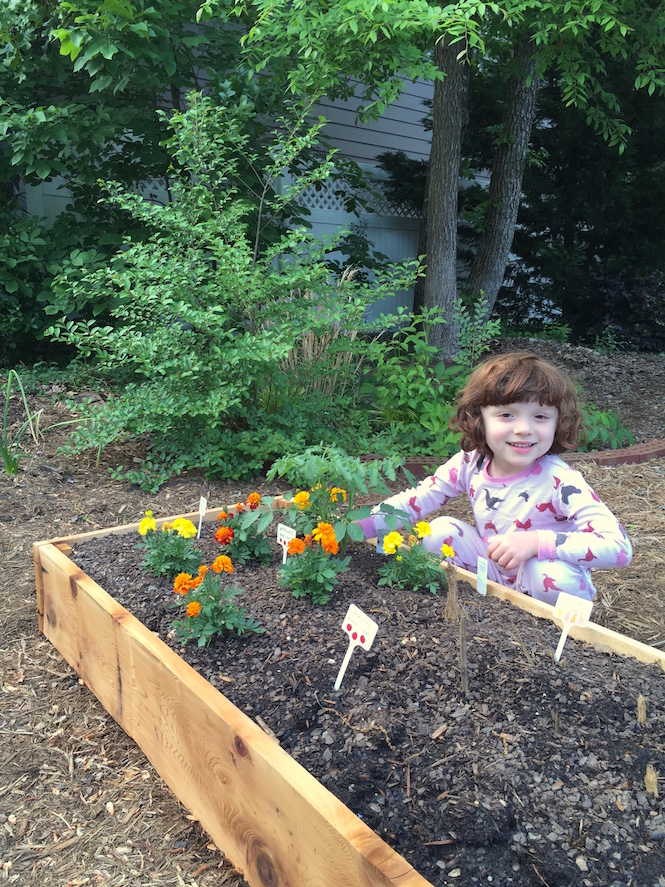 Our new garden bed, and my cute little gardener in her PJ’s!
There you have it! Like I said, this is Gardening 101. There’s so much more I could share, but I hope this gives you a great start in growing some fun things this year.
In the next and final post of this series, I’ll share some of our own garden plans with you, and a sample starter veggie garden plan for those of you who want a great place to begin.
Your turn! I’d love to hear what you are planning to grow this year. What supplies or seeds you are considering? Feel free to ask any questions you have, too!
——–
Now for an amazing giveaway! I wish I could enter myself!
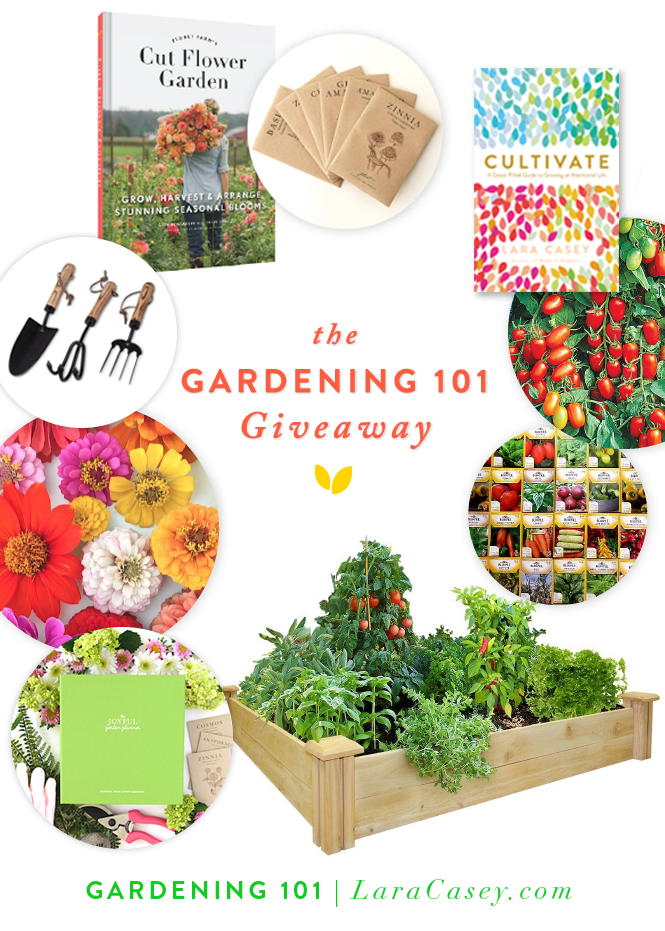
This is everything you need to start your own garden–or bless someone else with one!
— Greenes 4′ x 4′ cedar raised bed kit (how cool is this!?) — Deanna
— A collection of best-selling Burpee vegetable seeds: — Robin
Tomato, Atlas F1
Tomato, Shimmer F1
Cucumber, Bragger
Zinnia Forecast
Sunflower, Sunray Yellow
— Gardener’s Supply Company tool set — Sarah
— Floret’s Cut Flower Garden book and seed collection — Lindsey
— Park Seed Profusion double-flowered zinnia seed collection — Rachel
— A Joyful Garden Planner from my friend, Amber! Amber was kind enough to donate this planner, and give you 25% your order with code “CULTIVATE” if you can’t wait for the giveaway results! The code is good through April 30. — Rosanne
— And a signed copy of my book, Cultivate! — Sheena
Enter below. Giveaway ends April 9th!
Ready for Part 3? Here you go!
keep reading
32 Comments
-
 on March 13, 2017 at 4:03 pm
Loving this gardening series! It’s inspiring me to start a garden, although I don’t think I’m completely there yet. One thing I wanted to add, however, is that you can get your soil tested for free at your local Cooperative Extension office! Chatham County has a wonderful Cooperative Extension service and you can pick up a box and a form there if you ever find yourself near Pittsboro. They will ship it to the NCDA for testing and you’ll get a report back! It’s free between April 1 – November 31, and $4 between December 1 – March 31.
https://chatham.ces.ncsu.edu/soil-testing-for-lawns-and-gardens/
-
 on March 13, 2017 at 4:08 pm
This is awesome! I didn’t know this! Yahoo! Thanks for sharing, Taylor.
-
-
 on March 14, 2017 at 9:22 am
Thanks for sharing, Lara! Starting seeds indoors has always seemed like so much work, but I think I could manage the egg carton method. 🙂 How do you know when to start your seeds indoors? Can you leave them indoor too long?
-
 on March 14, 2017 at 9:55 am
Great question! You’ll find the info for each particular seed variety on most seed packets. Some plants don’t do well if they are started indoors, and some love it. In general, it’s 6-8 weeks before the last danger of frost.
-
 on March 14, 2018 at 6:41 pm
I can testify that you CAN leave them indoors too long (although, it’s avoidable if you’re not me, ha!). I planted seeds and they outgrew the size of their containers before I could plant them. I should have bit the bullet and transplanted them into bigger containers since I was still worried about frost (where I live).
-
-
 on March 14, 2017 at 10:53 am
This is great! Have you heard of “no dig” or “back to Eden” gardening? They use compost and wood chips to improve soil with minimal tending (wood chips absorb water and smother weeds). Definitely worth looking into if your soil needs help!
-
 on March 14, 2017 at 12:53 pm
This is a fabulous post and so much information! Thank you for all the details and time it took to put this together!
Right now we are getting 18 inches of snow in CT so any outside stuff is on hold for a while. I think I am going to start with the egg cartons….that actually looks manageable for me and my girls at this stage! (that’s how green we are!!) Going to do some more research and seed shop this weekend! woohoo- thanks again! -
 on March 14, 2017 at 3:40 pm
I look forward to these gardening posts so much! I’m also learning to garden with my girls, and we all love it so. Thank you, thank you for taking the time and energy to create this, it was a bright spot on a snowy day!
-
 on March 14, 2017 at 5:20 pm
I actually got the Mini Farming book for Christmas this year and enjoyed it!
-
 on March 14, 2017 at 5:48 pm
Cotton! I am planting a few cotton seeds. I want the grands to see how their clothes are made! Love this series! Thank you Lara! Nonny (angela)
-
 on March 14, 2017 at 8:33 pm
I’ve been looking into more flowers this year, especially those that will deter pests/attract beneficial insects. I’m also pretty excited about trying sweet potatoes for the first time 🙂
Have you ever used landscaping fabric Lara? I’m definitely interested in using it to control weeds this year but have no experience. -
 on March 15, 2017 at 12:38 pm
After I did a bit of research I opted to build my raised gardens out of cinder blocks. I didn’t want to use treated wood as the treatment can allow toxins to get into the soil and the untreated wood will rot faster. The cinder block gardens aren’t nearly as pretty as the wood raised gardens, but they are easy to build (no tools required) and you can adjust the size from year to year by adding or removing cinder blocks.
-
 on March 15, 2017 at 1:18 pm
Hello Lara!
Thank you for the Gardening 101 guide. I’ve been looking forward to reading it 🙂 Thank you especially for including info on how you built you your raised garden beds. I have nasty clay soil too & it’s been difficult growing plants even though I’ve amended the soil. So this year I’m planning on doing raised beds.I’m planning on growing roma tomatoes, basil, green onions, lettuce, broccoli, collard greens, bok choy, and several varieties of flowers (including zinnias!).
I like using organic seeds & supplies (dirt, homemade compost, fertilizer, etc) because it’s healthier for me gardening and for my family eating and for babies, kids, and pets playing in my garden.
-
 on March 15, 2017 at 3:34 pm
Since I’m living in an apartment this year while at grad school, I sadly don’t have my own garden! I do, however, work at a local museum in Waco, TX and happily volunteered to be in charge of our garden. I have been longing for weeks to get my hands in the dirt and am still working on planning. So far, I’m, thinking corn, beets, carrots, tomatoes, squash, and some pumpkins. Anything else I should include?
-
 on March 15, 2017 at 3:52 pm
Love this series and really hope to get our garden up and going with flowers and a few veggies. Your Xenia stories make me want some of them!
-
 on March 15, 2017 at 3:52 pm
I am going at it for the first time this year! We just bought our house and got married in the fall. I can’t wait to get started!! I have two garden boxes begging to be planted!
-
 on March 15, 2017 at 5:04 pm
I was thinking today about how the past few years we’ve planted, but haven’t tended, in our garden. And very little has grown well. A lot like life! Looking forward to planting and tending creole tomatoes, okra, lots of basil, cucumbers and flowers!
-
 on March 16, 2017 at 9:13 am
This is so helpful, Lara! Feeling excited and encouraged to start a garden – fairies and flowers and veggies – with my littles this year!!! Thank you!!!!
-
 on March 16, 2017 at 10:01 am
I’ve dreamed of starting a garden for a while now – I just want color! Flowers and pretty veggies 🙂
-
 on March 16, 2017 at 10:32 am
We’re slowly growing our garden – hopefully it’ll be a big one soon. But this year we’ve added two bunches of lavender (which are going crazy and are so lovely), two lantanas, a few pots of marigolds, and another privet tree. They’ve joined our azaleas, Japanese privet, mint, and succulent (that is still miraculously alive!). I get such joy out of sneaking out at daybreak to water them before the Louisiana heat sets in.
-
 on March 16, 2017 at 12:47 pm
Thank you so much for sharing!! I am going on my 3rd year of gardening and my 2 year old is my apprentice. Keep up the great work mama! You have been so encouraging over the years!
-
 on March 16, 2017 at 2:15 pm
I would love to win this to start a garden with my 2 and 4 year olds this year. Thank you!!
-
 on March 16, 2017 at 2:16 pm
This is just what I’ve been looking for!!! Can’t wait for our first garden this year!
-
 on March 16, 2017 at 5:04 pm
We have a small garden, but it always feel haphazard. You are inspiring me to be more thoughtful and intentional. And to grow more flowers!
-
 on March 18, 2017 at 12:18 am
I’ve already (overbought) my seeds-I’m doing a combo of some veg, herbs and am planning a cut flower garden (thank you so much Lara for introducing me to Floret’s IG and site! Total addict now) for the first time this year. I have had to purchase a second set of grow lights-how long do the plants stay under these lights? Until they are a certain height or until they are planted into the garden?
-
 on March 23, 2017 at 3:17 pm
I love this series!! We live in an apartment….I wish I had room to grow a small garden of some kind. Do you have any suggestions for those of us that don’t have a backyard to grow in?
-
 on March 23, 2017 at 4:54 pm
It depends on the amount of light you have. If you have an apartment deck or extra sunny window, a container or two might work! : )
-
-
 on March 24, 2017 at 12:02 am
Love this! Super helpful! Wondering if you can elaborate on the soil mixture? What ratio do you do of each component? Thank you!
-
 on April 11, 2017 at 1:16 pm
Hi, Anne! For amending my soil, I use about one bag of each element and mix it into each 4 x 4 raised bed. Starting from scratch, I would mix in 1 cubic foot of black cow and 1 cubic foot of mushroom compost into a great bagged soil mixture of your choice. I hope that helps!
-
-
 on March 28, 2017 at 5:43 pm
I’ve loved following you and Gracie’s Garden! Thank you for sharing all of your gardening knowledge! I can’t wait to get our summer garden going.
-
 on March 19, 2018 at 9:05 am
These posts are so helpful! The hardest part is understanding the basics to know where to start. Thanks for the links to see how to plan for your specific region. The direction makes all the difference. I can’t wait to get started!
-
 on April 6, 2018 at 4:23 pm
This has been so helpful. We recently moved and have a bit of shady space, except on our deck. I am excited to try some new things and still grow some beautiful flowers and yummy veggies.